From a Ticket
1. Click the client logo on the bottom panel to access the Nav menu.
2. Select Tickets under Workflows.
3. Select the agent's name (in bold) whose time sheet you'd like to view from the Ticket Log.
4. Scroll to the right to select Time Sheet from the middle menu under the agent's name.
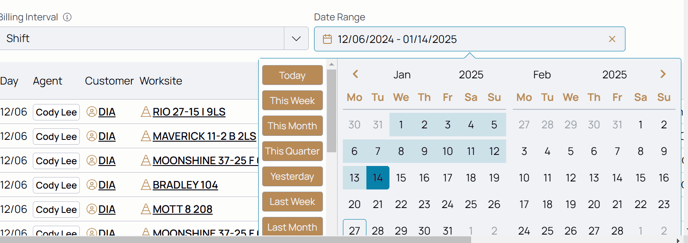
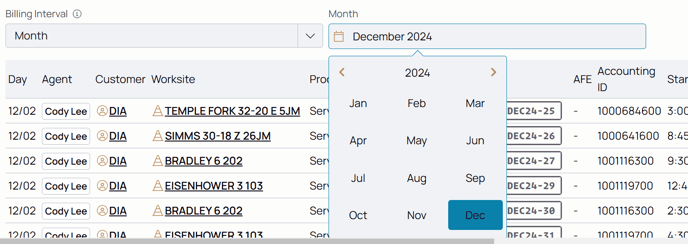
5. Choose between Billing or Shift under the Billing Interval dropdown.
5a. Shift: Allows you to select shifts from any specific date range.
5b. Month: Allows you to select monthly views of timesheets.
6. Select your choice.
7. Click Select [insert billing interval].
8. Select the date range or the month you'd like to view.
9. Click the Billing Interval dropdown to change to the other choice.
10. Click Select [insert billing interval].
From a Customer Profile (no search bar)
1. Click the client logo on the bottom panel to access the Nav menu.
2. Select Customers under Workflows.
3. Select the customer.
4. Select the Dedicated Agents from the top menu.
5. Choose the agent whose time sheet you'd like to view.
6. Choose between Billing or Shift under the Billing Interval dropdown.
7a. Shift: Allows you to select shifts from any specific date range.
7b. Month: Allows you to select monthly views of timesheets.
8. Select your choice.
9. Click Select [insert billing interval].
10. Select the date range or the month you'd like to view.
11. Click the Billing Interval dropdown to change to the other choice.
12. Click Select [insert billing interval].
From a Customer Profile (search bar)
1. Click the client logo on the bottom panel to access the Nav menu.
2. Select Customers under Workflows.
3. Select the flag icon to open the search function.
![]()
4. Enter the customer's name and search, pulling up the results.
5. Select the customer.
6. Select the Dedicated Agents from the top menu.
7. Choose the agent whose time sheet you'd like to view.
8. Choose between Billing or Shift under the Billing Interval dropdown.
9a. Shift: Allows you to select shifts from any specific date range.
9b. Month: Allows you to select monthly views of timesheets.
10. Select your choice.
11. Click Select [insert billing interval].
12. Select the date range or the month you'd like to view.
13. Click the Billing Interval dropdown to change to the other choice.
14. Click Select [insert billing interval].
From an Agent Profile
1. Click the client logo on the bottom panel to access the Nav menu.
2. Select Agents under Workflows.
3. Select the flag icon to open the search function.
![]()
4. Enter the agent's name and search, pulling up the results.
5. Select the agent's name whose time sheet you'd like to view.
6. Scroll to the right to select Time Sheet from the middle menu under the agent's name.
7. Choose between Billing or Shift under the Billing Interval dropdown.
7a. Shift: Allows you to select shifts from any specific date range.
7b. Month: Allows you to select monthly views of timesheets.
8. Select your choice.
9. Click Select [insert billing interval].
10. Select the date range or the month you'd like to view.
11. Click the Billing Interval dropdown to change to the other choice.
12. Click Select [insert billing interval].